Welcome to the Memory Blog

Memory blog will bring you fresh ideas and tech news related to memory storage world, you can find a new entrance for the information of customized Memory card, USB Flash drives and storage gadgets. Our blog has plenty of latest memory products, intriguing tech story and practical order skills catering for the needs of everyone.

How to identify Counterfeit Micro SD cards?

Introduction

Fake Micro SD cards are flooding the market, leaving buyers disappointed with useless storage. They promise more than they can deliver, often resulting in lost money and data.
Fortunately, with the right knowledge and tools, like an SD card file size scam check, you can avoid these scams and ensure you’re getting the storage you paid for.

This write-up will walk you through spotting fake cards, testing their actual size, and steering clear of scams.

Overview of Micro SD Cards

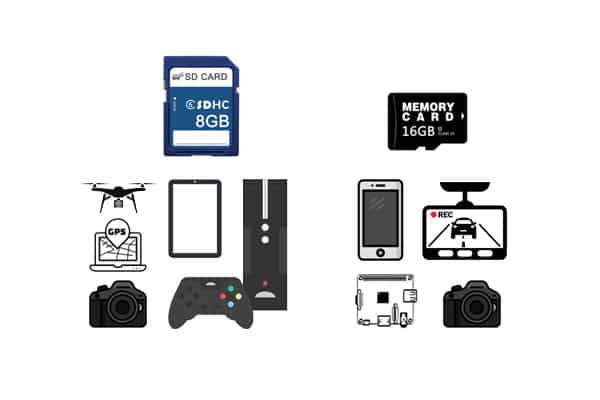
Storage needs are everywhere, and Micro SD cards are the answer. These small cards help expand storage for smartphones, cameras, and gaming systems. Their affordability and compatibility make them an easy choice for many.
However, counterfeit versions are becoming more common as Micro SD cards become more popular. These fake cards closely imitate authentic ones, including their branding and packaging. Buying a counterfeit without paying attention can risk your data and funds. Learning to identify fakes is crucial to avoid these issues.

How to Spot the Difference Between Real and Fake Micro SD Cards?

Differentiating them takes effort, but knowing the right signs can save you. Here’s what to observe:

1. Printing

Look at the card’s logo, text, and overall design closely. Genuine Micro SD cards have clean, sharp printing with consistent fonts and colors. Counterfeit cards may have blurry logos, spelling mistakes, or inconsistent hues. Be sure to examine the packaging. Authentic brands maintain high-quality standards in both products and packaging.

2. Price

If a deal feels too good, it often is. Counterfeit cards are frequently sold at extremely low prices to draw in buyers. While discounts happen, unusually low prices should make you pause. Always compare with trusted sellers to spot any irregularities.

3. Speed

Running a speed test with proper software is the best way to test a Micro SD card. Fake cards can’t usually match the advertised speeds. For instance, a “Class 10” or “U3” card might perform slower than expected, revealing it’s fake.

4. Capacity

Some of such fake cards list false storage sizes. You must check actual size of SD card. For example, a 128GB card may only store 8GB before failing. You can use tools like H2testw or FakeFlashTest to check the true capacity of the card.


It’s vital to run this SD card file size scam check to confirm the card matches its claimed capacity and avoid data loss.

Paying attention to these factors will help you recognize real Micro SD cards and avoid storage scams.

The Risks of Using Counterfeit Micro SD Cards

While these SD cards might seem affordable, the risks can be significant. Here’s why relying on fake cards for storing data can be dangerous.

1. Data Loss

Fake Micro SD cards carry the risk of data loss. These counterfeit cards often fail to store data properly, resulting in file corruption or complete loss. They might appear to have enough space, but once large amounts of data are saved, files can vanish, or the card may crash. Sadly, recovering lost data is almost impossible.

2. Money Loss

Fake Micro SD cards seem tempting because of their low prices, but they come with hidden costs. When they stop working, you lose both the product and your data. If you use them for important tasks, replacing the lost files or repairing devices can become an expensive problem.

3. Time Loss

In any professional setting, time is key. Fake cards can delay processes due to transfer issues or slow processing. This can result in missed deadlines, lost business, and interruptions. What should be a quick task can waste hours.

4. Project Failure

Creative professionals working with videography or photography know the importance of reliable storage. Using these cards can be disastrous. A failed card could cause hours of footage to vanish, delaying or ruining a project. This not only affects your work but also your reputation.

When you realize the risks, it becomes clear that using genuine, reliable Micro SD cards is essential. Fake cards can lead to problems like frustration, loss of money, and failure in various aspects of life.

How to Avoid Ordering Fake Micro SD Cards?

The best way to avoid the risks of these cards is to be proactive in your purchasing process. Purchase from trusted retailers, test samples, watch pricing, and inspect the card closely. This effort can save you from long-term issues.

1. Purchase from Reputed Suppliers

For authentic Micro SD cards, always buy from trusted, well-known retailers or the manufacturer. Reputable suppliers focus on authenticity and customer satisfaction, making counterfeits less likely. Avoid third-party sellers on eBay or Amazon, where fake cards are often offered at lower prices. Stick to authorized dealers or official sites for genuine products.

2. Sample Testing

If you’re planning a bulk purchase of Micro SD cards, test a few first. Most suppliers let you check them for quality. You can spot fake cards before committing to a full purchase by running tests for speed and capacity.

3. Reasonable Pricing

A Micro SD card that costs much less than the market price is a red flag. Counterfeit cards are often sold at a steep discount to trick buyers. Discounts happen, but prices that seem too cheap are a warning sign. Always compare prices from trusted retailers to be safe.

4. Check the Appearance

When you receive a Micro SD card, inspect it and its packaging closely. Genuine cards feature sharp logos, clear printing, and consistent fonts. Watch for blurry text, misspelled words, or any damage to the packaging. Counterfeit cards often have inconsistencies in logo design or color. A careful check can prevent you from getting a fake.

Conclusion

While counterfeit Micro SD cards might seem like a deal, the risks are high. You could lose data, waste money, and face other problems. Counterfeit cards often fail to deliver on their promised storage or speed.

Look for red flags like oddly low prices, poor printing, or inconsistencies in performance. Always purchase from trusted vendors, test cards when you can, and avoid deals that seem too good to be true. An extra caution can help you get the real thing, keeping your data secure.

FAQs

What should I look for in a good micro SD card?

A quality Micro SD card guarantees reliable performance and security.

To find the right Micro SD card, focus on these essentials:

  1. Buy from trusted names like SanDisk, Samsung, or Kingston.
  2. Pick a card with enough space for your needs, such as 32GB or 64 GB.
  3. Look for cards with a fast-speed class, like Class 10, U1, U3, or V30.
  4. Go for cards resistant to water, shock, and temperature extremes.
  5. Ensure the card works with your device, whether it’s a phone, camera, or tablet.

How to Test a MicroSD Card?

Test your MicroSD card by following these steps:

How to test micro sd card and sd cards or nandflash,Bulk memory cards

  • Verify storage: Use tools like H2testw or FakeFlashTest to ensure the actual capacity matches the claimed amount.
  • Run a speed test: Use CrystalDiskMark to measure the read and write speeds. Fake cards often fall short.
  • Transfer files: A real card will handle file transfers smoothly, while fake ones may freeze or cause errors.

How can I do SD card file size scam check?

Test your SD card’s quality with software to measure speed and capacity. CrystalDiskMark or SD Card Speed Test will show whether the read and write speeds are as expected.

Plus, run an SD card file size scam check using tools like H2testw or FakeFlashTest to verify the actual storage size. A mismatch in results indicates the card may be counterfeit.

The Way of Using Micro SD card for Kindle Fire Tablet

Introduction

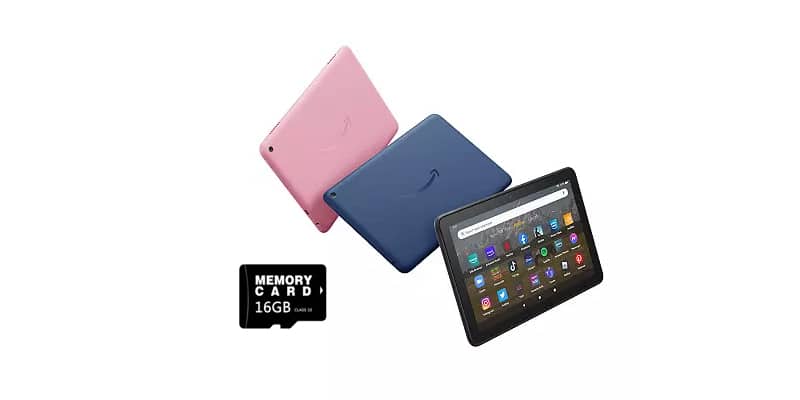
If you enjoy your Amazon Fire tablet for its affordability and features, you may run into storage issues. Its built-in memory fills up fast with apps, movies, and books. Adding a micro SD card for Kindle Fire lets you store more without worry. Adding a memory card is a simple solution. It lets you store more files without slowing the device down. This is ideal for users who often download media or use apps that need extra storage. Organizing your files becomes easier with an SD card for your Fire tablets.This write-up will walk you through the simple steps to use a MicroSD card in an Amazon Fire tablet and explain why expanding your storage helps.

Micro SD Cards for Amazon Fire Tablets

The small internal storage of most Fire tablets—usually 8GB or 16GB—fills up fast with media and apps. Fire Tablets Models are designed with expandable storage slots, making this upgrade seamless. Using a microSD card provides extra room and improves performance. Fire tablets vary in the SD cards they can support. Models like the Fire HD 8 and Fire 10 accept up to 1TB cards, but if you’re using an SD card for Fire 7 tablet, you get smaller storage limits. Always verify your tablet’s specifications first.

Using Micro SD card for Kindle Fire Tablet

Step 1: Insert the Card

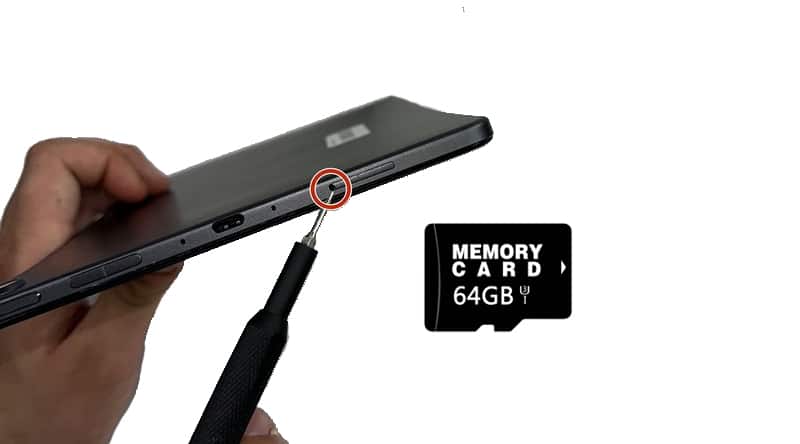
Power off your Fire tablet. Locate the SD card slot, typically near the power button or charging port. Ensure the metal contacts face downward when placing the card. Turn on your tablet. It should detect the card automatically. If you’re using a Fire 7, be gentle as the slot is smaller.

Step 2: Format the Card

Formatting may be required for the SD card to work properly. Go to Settings, then tap Storage. Find the card in the list and select it. Choose Format and follow the instructions. Keep in mind that formatting deletes everything on your card. Always back up your data first.

Step 3: Adjust Storage Settings

Set the SD card as the default storage for apps, media, and documents. Navigate to Settings > Storage. Specify the card as the default location for photos and videos.

This setup keeps your tablet’s internal storage free for other tasks.

Step 4: File Management

Use the File Manager app to organize content. Transfer files between internal storage and the SD card or move apps if your tablet allows it.

Benefits of Using a Memory Card for Fire Tablet

Increased Storage Capacity

One big advantage of a micro SD card for Kindle Fire is extra storage. Fire tablets have limited internal space, which fills up fast if you love reading, watching movies, or playing games. An SD card gives you room to store more and avoid storage issues.

Improved Device Performance

A crowded internal storage can make your device sluggish. Shifting apps, media, and data to an external memory card can free up space for system processes, improving performance.

Cost-Effective Solution

Upgrading your tablet for more internal storage can be pricey. Adding an SD card is a much cheaper way to get more space. Micro SD cards for Kindle Fire are widely available and fit a range of budgets.

Easy to Use and Manage

After inserting the SD card, it works smoothly with the Fire tablet’s system. You can transfer files between the SD card and internal storage, choose default storage settings, and manage media effortlessly through the user-friendly interface.

Where to Buy Suitable SD Cards for Your Fire Tablet?

To get the right Kindle Fire SD Card, consider shopping at these stores:

  • Amazon: Since you’re using a Fire tablet, Amazon’s selection offers different capacities and speed classes, making it simple to choose one that fits.
  • Best Buy: Carries SD cards for various Fire tablet models, including trusted brands like SanDisk and Samsung.
  • Walmart: Offers SD cards for Fire tablets at competitive prices, available online and in-store.
  • Target: Their selection includes free in-store pickup and discounts on certain models.

Conclusion

In a nutshell, a Micro SD card for Kindle Fire expands storage and boosts performance. Following this guide, you can easily set up and manage extra space for your Fire tablet. The added storage gives you flexibility whether for apps, photos, videos, or music.Just pick a compatible, high-quality SD card with enough storage and speed. After installation, your Fire tablet will work better and offer a smoother experience.

FAQs

What SD card does Kindle Fire use?

Fire tablets, including Kindle Fire, accept microSD cards (16GB to 1TB), for extra storage. Brands like SanDisk, Samsung, and Kingston are reliable options. A Class 10 or UHS-I card ensures smooth operation.

Do I need to format a Micro SD card for Kindle Fire tablet?

Yes. Formatting ensures the card is set up correctly, letting you store apps and other content. You can choose whether to format it for external or internal storage.

How to get more storage on an Amazon Fire tablet?

To get more storage on your Amazon Fire tablet, you can:

  • Add a microSD card, an affordable solution to increase storage. Manage your apps and media. Move apps, photos, and videos to the SD card or Delete unnecessary files.
  • With Amazon’s cloud, storing and retrieving your files becomes hassle-free. Your tablet stays light, as no additional storage is used.

How many GB do I need for my Kindle?

Your Kindle Fire storage needs will vary based on usage. 8GB or 64 GB is enough for simple reading and basic browsing. If you store a lot of videos and large apps, a 128GB or larger microSD card will give you more space.

How to Get the Best Micro SD Card for Dash Cam?

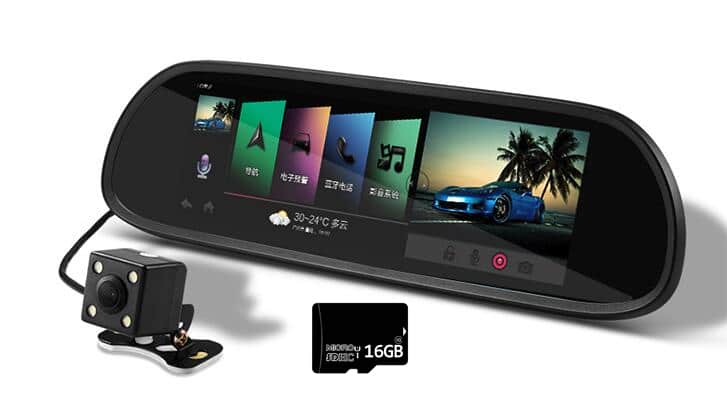
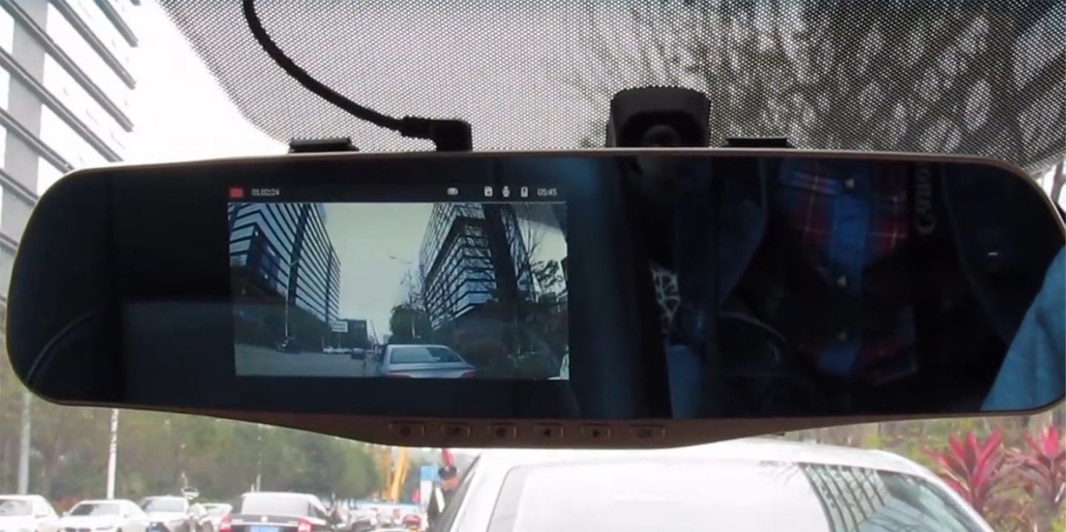
Dash cams are the best safety partners for your driving. They can capture things like your daily commute, and road trips, or even help show off your neighborhood when selling your home. They’re also great for safety, as they can help prove who caused a car accident or record events around your parked car.
Dashcams store data on SD or microSD cards. The storage is important because dash cams record for long periods. While large memory cards seem like a good choice, regular cards wear out quickly due to constant rewriting. Dash cams need high-endurance cards designed for heavy use.
Picking the best micro SD card for a dash cam goes beyond capacity or cost. Look for one designed to handle constant use and high-pressure recording.

Different Types of Dash Cams

Each type of dash cam has a special purpose. Here are the main types:

1.Single Lens Dash Cams

Single-lens dash cams are the most basic models. They feature a single camera that records what happens in front of your vehicle. These are typically mounted on the front windshield and are ideal for basic recording needs.

2.Dual-lens dash cams (for front + rear recording)

Featuring two cameras, dual-lens dash cams offer both front and rear monitoring. The front lens records the road ahead, and the second lens covers the back. This combination provides well-rounded coverage for added safety.

3.Dual-lens dash cams (for front + inside recording)

Built for dual functionality, these dash cams record both the exterior and interior of a car. One lens captures the road, while the other monitors the cabin, focusing on passengers or the driver. They are particularly useful for rideshare drivers or for keeping track of activity within the cabin.

4.Professional Dash Cams

Built for commercial purposes, professional dash cams suit vehicles such as delivery vans, taxis, and company cars. They ensure reliable, continuous recording, helping businesses manage fleets and enhance security.

Why Is Choosing a Durable MicroSD for Dash Cam Important?

Choosing a reliable microSD card for dash cam is very essential. It will make sure that your footage will always be accessible when needed. Here’s why it’s crucial:

  • Reliable in Important Moments: You don’t want to find out after an accident that your video is gone or broken because the card wasn’t strong enough.
  • Never-ending Recording: Dashcams record continuously, day or night. A sturdy, high-quality card can protect your recordings from this continuous use, which a regular card might not be able to handle.
  • Works in Extreme Weather: A good microSD card can withstand harsh weather conditions. It’s better than a typical one, regardless of how hot or cold it is outside.

Understanding Flash Type Memory

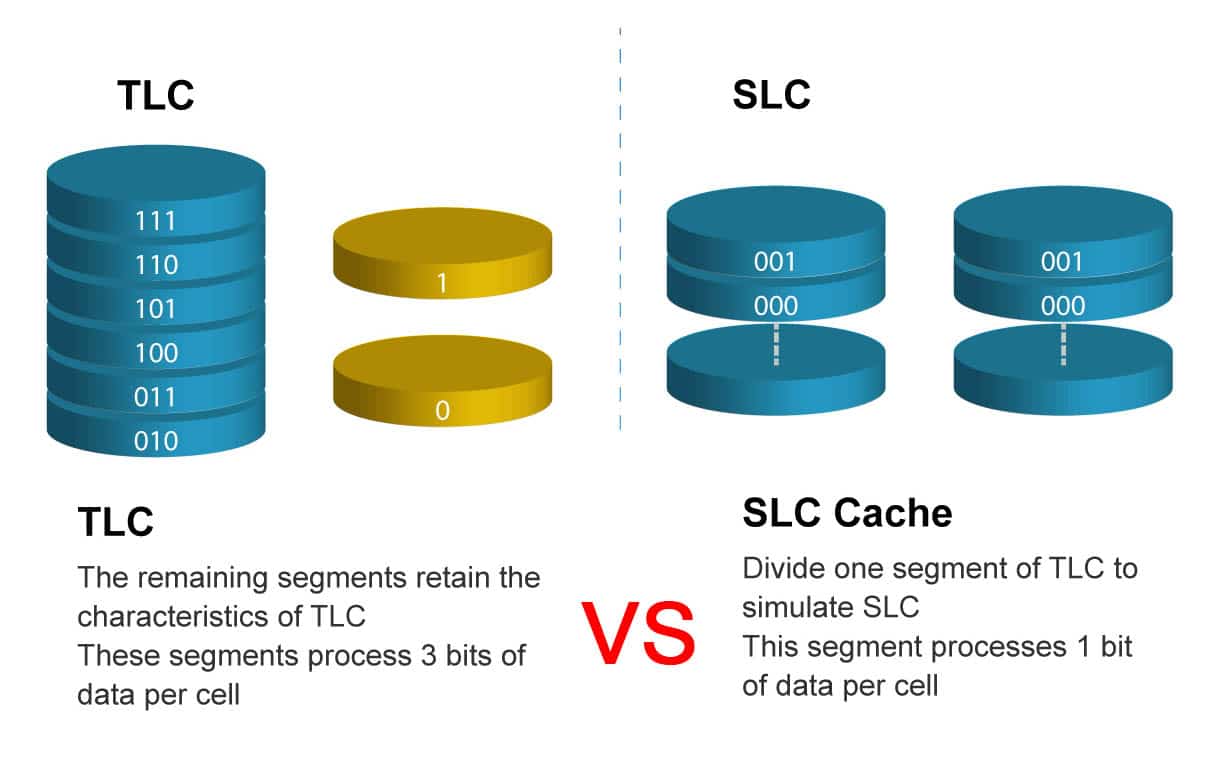
Flash memory stores data reliably without power. Valued for its speed, durability, and compact form compared to hard drives, it’s common in storage devices, including SD cards. Three types of flash memory are commonly seen in dash cam micro SD cards:

SLC VS TLC

  • Single-Level Cell: The most costly memory type, yet the most dependable and long-lasting. SLC is ideal for heavy-duty applications like dash cams since it can tolerate constant writing and wiping.
  • Multi-Level Cell: MLC can read and write faster than TLC due to its simpler structure. It is best suitable for devices that need fast data access.
  • Triple Level Cell: TLC is less expensive as compared to MLC or SLC. Its simple structure and high storage capacity make it the best fit for consumer-grade SSDs. TLC is frequently a wise option for those who do not intend to use the dash cam intensively.

Top Recommendations: Best Micro SD Cards for Dash Cams

Choosing the best micro SD cards for dash cams will take time and effort. Here’s what you can do:

  • Research before you jump into the market.
  • Don’t go on brand names, look out for reliable manufacturers.
  • Check reviews on their websites.
  • Compare prices in the market.

A few reliable manufacturers you can look into are SanDisk, Kingston, etc. No matter what SD card you opt for, we suggest you replace it annually.
Purchasing the appropriate SD cards for UltraDash 4K video recording resolutions can make recorded video footage more dependable and frame-free. Determining which memory card types and speeds would function best is crucial.
One-minute video at 30 frames per second roughly takes 450MB of memory. So for our 4k dash cam, you can use a U3 micro SD card. To view 4k videos clearly, it is best advised to move them to your computer because they seem choppy or lag if viewed on SD cards.

Pro Tip for Choosing a Suitable Micro SD Card for Dash Cam

Make sure the writing speed is sufficient when selecting a card. For recording 1080p HD video, a Class 10 (10MB per second) card is typically suitable. When making your initial choice, you can seek professional assistance.

SanDisk High Endurance Micro SD Card

  • Capacity: 64GB, 128GB
  • Speed Class: UHS-I U3
  • Endurance: Designed specifically for continuous recording

Samsung Pro Endurance Micro SD Card

  • Capacity: 32GB, 64GB, 128GB
  • Speed Class: UHS-I U3
  • Endurance: Designed for up to 43,800 hours of video recording

Kingston High Endurance Micro SD Card

  • Capacity: 32GB, 64GB
  • Speed Class: UHS-I U3
  • Endurance: Built for continuous writing and recording

Where to Buy the Best Micro SD Card for Dash Cam?

Numerous local and internet retailers carry high-quality micro SD cards for your dash cam. Among the reliable choices are:

  • Amazon: Provides a large selection of dash cam micro SD cards along with user reviews, making it simple to select the best one for your requirements.
  • Websites of manufacturers: You can check reputable companies like Kingston, Samsung, or SanDisk.

Conclusion

Although it might seem minor, selecting the appropriate micro SD card for your dashcam is important to the safety and security of your recorded video. A high-quality micro SD card will ensure uninterrupted, fluid dash cam recording. Therefore, it makes sense to invest in the best one.

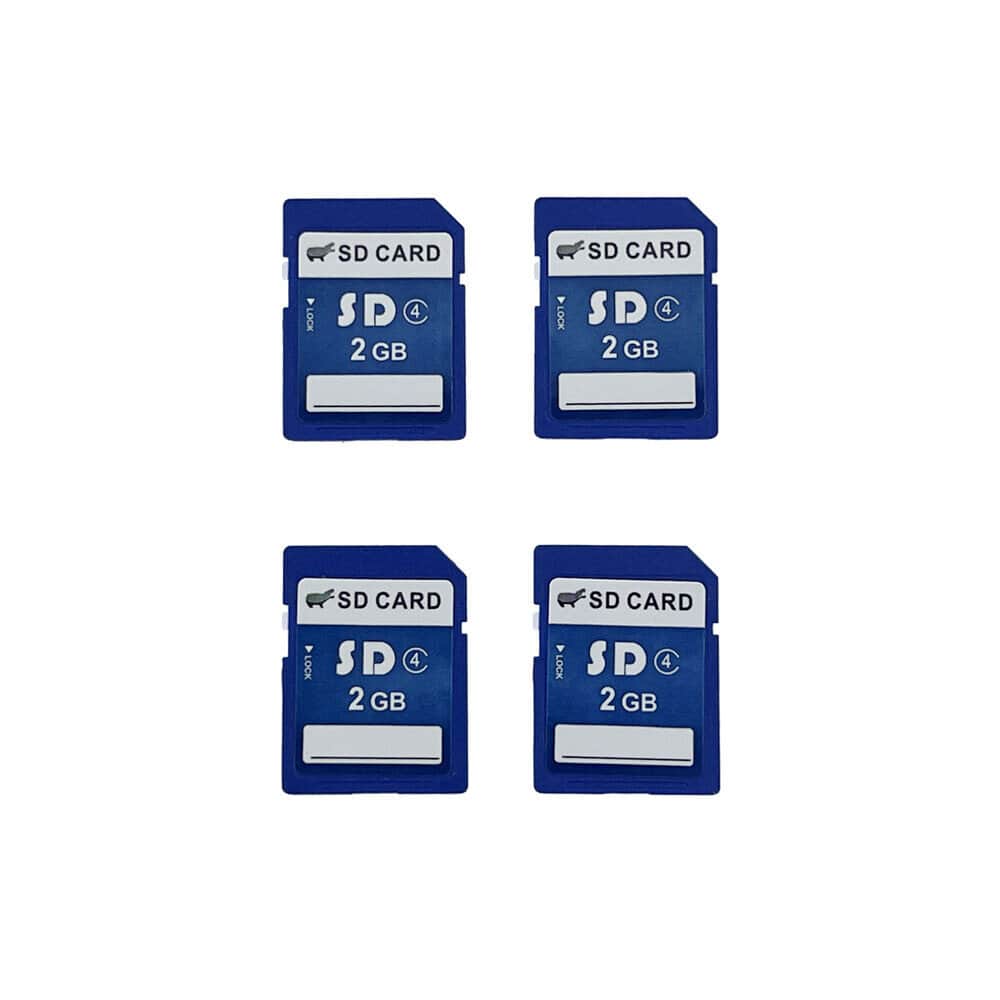
How Much Is The Storage Of A 2 GB Memory Micro SD Card?

When picking a microSD card, understanding storage capacity is essential. A 2GB card might not hold as much as modern cards, but it’s still practical for storing a few photos, videos, or music on older devices. This article explains how many photos and videos can 2 GB hold and offers practical tips for using it in older or low-storage devices.

2GB Micro SD Cards

A 2GB microSD card is more than just a storage option—it’s a compact, reliable solution for many devices. Found in phones, cameras, and tablets, these cards suit devices that don’t require high-capacity storage. Modern microSDs can hold terabytes, but 2GB remains a go-to for simpler technology.

Applications of a 2GB Micro SD Card

For light storage needs, a 2GB microSD card is a practical choice. Old mobile phone models, digital cameras, and MP3 players are some of its applications. Gamers might use it in handheld consoles, while GPS devices can rely on it for maps. For anything high-resolution, opt for a card with more capacity.Older devices with limited storage requirements pair well with a 2GB microSD card. It’s a good option for vintage MP3 players, basic phones, and navigation systems. While sufficient for everyday use, it won’t handle high-resolution media effectively.

How Many Photos and Videos Can 2GB Hold?

A 2GB microSD card’s storage capacity is shaped by various factors. Images captured at higher resolutions need more space, and uncompressed formats like TIFF or RAW also consume additional storage. Compression helps reduce file size, but videos with higher bit rates and frame rates can quickly fill the card.

How Many Pics Can 2GB Store?

A 2GB storage device can hold a different number of photos depending on the file size. Here’s a general breakdown:

Image Quality

Photo Size (Up to)

How Many Pictures Can 2 GB Hold?

Standard JPEG Photos

3MB

~680+ photos

High-Resolution Photos

5MB

~400+ photos

Low-Resolution Photos

1MB

~2000+ photos

How Many Videos Can 2GB Hold?

Video files, which combine audio with high-resolution visuals, need more space than photos. Their size is influenced by the quality of the video and its duration. Let’s look at some general video file sizes:

Video Type

Size/Min

Approx. Duration of 2GB

Low Definition (LD)

8MB/min

250 minutes

Standard Definition (SD)

30MB/min

68 minutes

High Definition (720p HD)

60MB/min

34 minutes

Full High Definition (1080p HD)

100MB/min

20 minutes

Note: These figures are only averages; the actual storage capacity may differ depending on file formats, compression techniques, and other variables.

Types of 2GB Micro SD Cards

Not all 2GB microSD cards perform the same. A variety of factors contribute to the storage and speed performance of a card:

Multi-Level Cell vs. Triple-Level Cell

MLC and TLC are the two types of NAND flash memory in microSD cards.

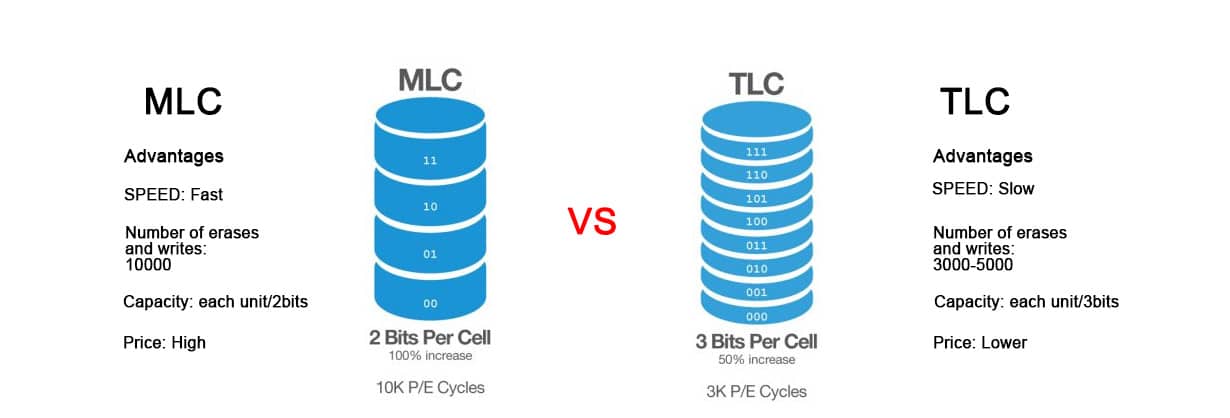
  1. MLC stores 2 bits per cell, making it faster and more durable. Cards with MLC flash memory generally perform better and last longer.
  2. TLC stores 3 bits per cell, which reduces cost but makes the card slower and less durable.

While storage capacity remains the same, MLC cards generally last longer and perform better.

Speed and Class Differences

Speed class ratings tell you how fast data can be written or read from a MicroSD card. These are shown with a number inside a “C” or “U.”

  • Class 4: 4MB/s write speed
  • Class 6: 6MB/s write speed
  • Class 10: 10MB/s write speed

For Full HD video recording or app usage, go for higher-speed classes. For simple storage, Class 4 or 6 works.

Brand Differences

2GB microSD cards from brands come with different levels of speed, performance, and dependability. It’s always safe to choose a brand with a solid reputation for quality and strong customer service.SanDisk offers dependable cards for everyday tasks. Toshiba is known for fast, durable cards. Kingston offers quality at an affordable price.

Where to Purchase 2GB Micro SD Cards?

You can find 2GB microSD cards in various locations, such as:

Amazon and eBay are popular online options, offering cards from various brands.
●Physical stores, such as Best Buy and Walmart, also carry them.
●For specialized needs, websites focused on cameras, gaming, or smartphone accessories often list 2GB models.

Prices vary, but these cards are generally inexpensive, with most costing only a few dollars.

Conclusion

A 2GB microSD card, while considered small by today’s standards, works well for light storage needs. It’s ideal for basic devices like feature phones, older cameras, or MP3 players. Depending on file sizes, it can hold hundreds of photos or several minutes of standard video.But, as file sizes balloon, especially with the rise in high-res images and 4K video, users who need extra storage will likely need to look at cards with capacities like 08-16-32 GB to 01 tb.Yet, by understanding its storage capacity, you can decide what fits your storage needs and device requirements.

What Kind of Camera Uses Micro SD Cards?

Many modern electronic devices employ micro SD cards. These cards are small but incredibly effective storage devices. These tiny cards store documents, apps, videos, and images from smartphones to drones. However, The question of What camera uses micro SD cards comes up often. So, this write-up explains it, offering the best recommendations for you. Let’s dive in.

What Camera Uses Micro SD Cards?

Dash cam often use micro SD cards, and they’re also found in many cameras. But what cameras support micro SD cards?

Action Cameras

Action cameras are the most common type of cameras that use micro SD cards. These cameras capture sharp video. High-quality photos and videos need plenty of storage, and micro SD cards are perfect for that. GoPro cameras rely on them for HD video shooting.

Digital Cameras

Digital cameras also frequently use micro SD cards, particularly point-and-shoot and mirrorless types. Although most utilize conventional SD cards, some of these cameras support micro SD cards directly or through a micro SD to SD card adaptor. These cameras, like the Sony Alpha series, are ideal for travel, vlogging, and daily photography.

Security Cameras

Micro SD cards are occasionally also used by security or surveillance cameras to store video recordings. Locally stored video from these cameras can be viewed on a PC or through an app.

Depending on the model, these cameras may accept micro SD cards with varying capacities and speeds.

Camcorders

While many camcorders use full-size SD cards, some action or pocket camcorders have slots for mini SD cards. You may record video with these small devices and save it to your micro SD card.

How to Select the Best Micro SD Card for Your Camera?

For optimal camera performance, focus on these key specs when choosing a micro SD card:

Speed Class

Speed class tells you how fast data is written to the card, important for crisp photos and smooth videos.

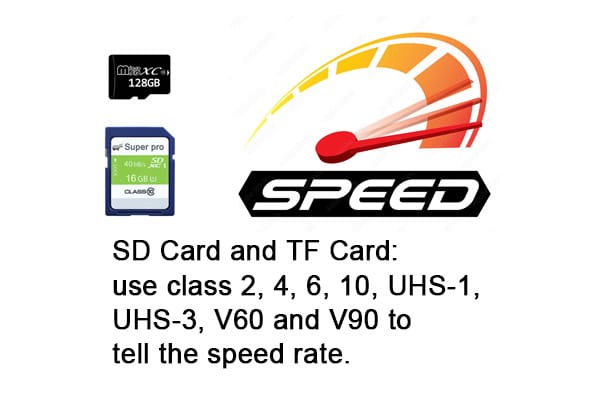
  • Class 10: With the lowest write speed of 10 MB/s, it’s found in many cameras. Works for HD video and continuous shooting.
  • UHS-1: Speed up to 104 MB/s, good for high-quality photos and 4K footage.
  • UHS-3: Reaches 312 MB/s, perfect for fast shooting and HD videos.
  • V30/V60/V90: These video speed ratings matter. V30 is the minimum for 4K, while V90 supports 8K recording.

Capacity

  • 1MB-8GB: Ideal for cameras that require a little storage for Functional test, or power-on test.
  • 16GB-32GB: Suitable for cameras that capture fewer images or video and are used for shorter periods.
  • 64GB-128GB: Ideal for cameras used for longer-term monitoring or those that capture more frequent images or video.
  • 256GB or More: Best for cameras that record large amounts of 4K video or require extensive photo storage

Compatibility

  • Confirm the micro SD card works with your camera. Not every camera supports large or high-speed cards, so verify the specs ahead of time.

Durability and Reliability

  • Temperature Resistance:> Look for cards rated for extreme conditions if using your camera outdoors.
  • Waterproof, Shockproof, and X-Ray Resistance: >For outdoor or rugged use, choose a card with added durability features.

Flash Memory Type

  • SLC (Single-Level Cell): Fast and durable but expensive, ideal for professional use.
  • MLC (Multi-Level Cell): A good balance of performance and price, widely used for general camera applications.
  • TLC (Triple-Level Cell): Slower but more affordable, suitable for everyday use in consumer-level cameras.
  • QLC(Quad-level Cell): Gives high storage capacity at a budget-friendly price, though it’s slower and less durable. It’s perfect for general-use consumer electronics.

Brand and Warranty

SanDisk, Samsung, and Lexar are safe choices for dependable products and excellent customer service.

Price vs. Performance

Higher-end cards often deliver higher speeds and more storage, but there’s no need to spend on what you won’t use. A Class 10 or UHS-1 card is perfect for everyday tasks. For 4K video or continuous shooting, go for UHS-3.

Where to Purchase the Best Micro SD Cards for Cameras?

Choosing a reliable micro SD card is crucial for quality, performance, and fair pricing. Here are some trusted options to ensure you get genuine products:

1. Official Brand Websites

SanDisk, Samsung, and Kingston’s websites are the best places to get genuine micro SD cards with warranties and reliable support.

2. Online Marketplaces

  • Amazon: Known for variety and competitive prices. Stick to Amazon Verified Sellers to avoid counterfeits.
  • Best Buy and Newegg: Trusted platforms offering frequent discounts and reliable delivery.
  • B&H Photo Video: Perfect for photographers, with tailored recommendations and specialized cards for professional use.

3. Photography and Outdoor Specialty Stores

Adorama and REI are excellent choices for photographers and adventurers. These stores stock durable micro SD cards that withstand harsh conditions, making them ideal for outdoor or professional use.

4. Local Electronics Shops

For last-minute needs, local electronics stores can be a convenient option. Just ensure you check the card’s authenticity and verify its warranty before purchasing.

5. Wholesale Clubs

For multiple micro SD cards, consider Costco or Sam’s Club for their bulk pricing.

6. Directly from Camera Manufacturers

Brands like GoPro and TrailCamPro sell micro SD cards optimized for their cameras. Buying directly ensures compatibility and reliable performance for specific models.

Pro Tips

  1. Check Compatibility: Make sure the card matches your camera’s requirements.
  2. Buy from Trusted Sellers: Avoid third-party sellers with poor reviews.
  3. Look for Deals: Take advantage of seasonal sales and bundles.
  4. Inspect Packaging: Authentic cards always come in secure, branded packaging.

Sticking to reputable sources ensures you get genuine products that deliver reliable performance for your cameras.

FAQs

What camera uses micro SD cards?

Micro SD cards store visuals in devices like cameras, drones, and camcorders.

Can you use a microSD with adapter in camera?

Yes. A camera that accepts SD cards can use a microSD card with an adapter.

What class SD card for GoPro?

Use a U3 microSD card for GoPro to handle 4K video recording with smooth performance.

Does GoPro use micro SD card?

Yes, GoPro uses microSD cards to store videos and images, with the appropriate speed and capacity needed for different recording types.

The Best SD Card For Game Camera And Trail Camera

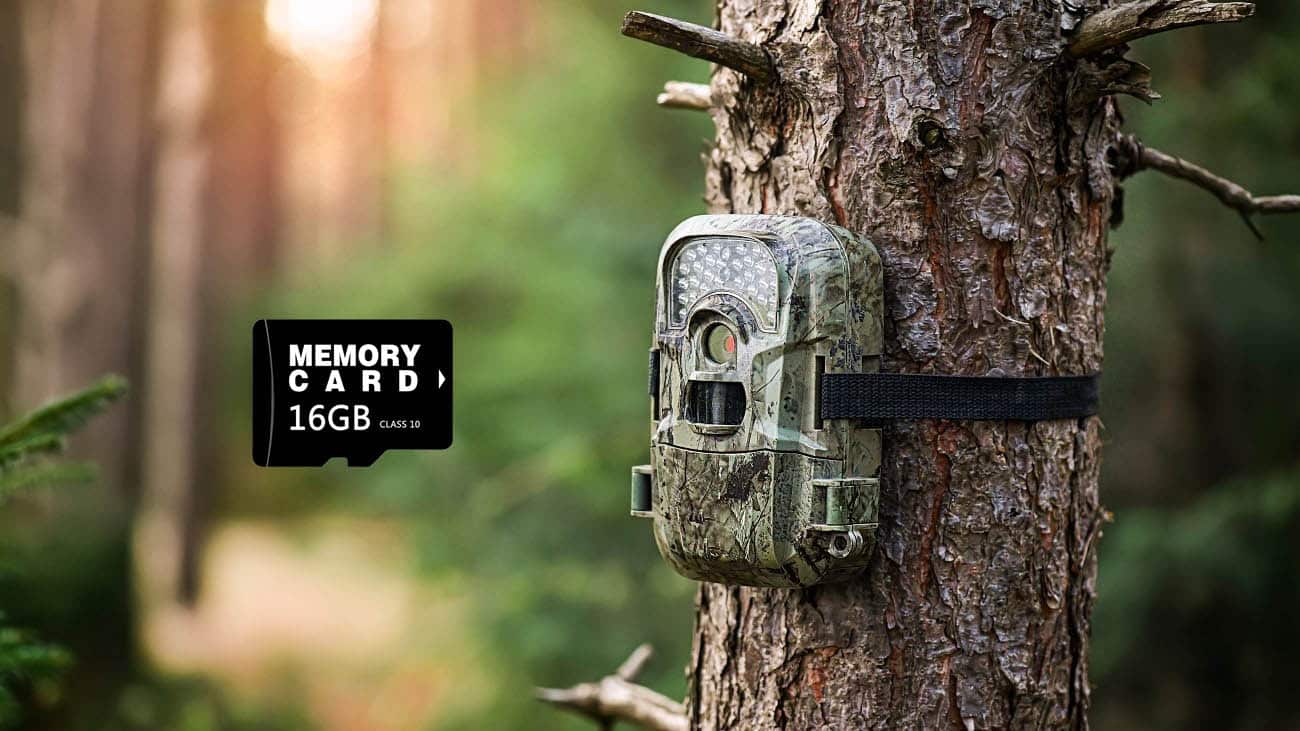
If you like hunting and photographing the beauty of nature, e-games, and trail cameras are your best tools. They allow you to observe animals and their behavior without upsetting them. But, no matter how advanced your camera is, the SD cards you select will impact its functionality. An SD card holds all your camera’s data, making it indispensable. Opting for a high-quality one ensures quick transfers, secure storage, and reliable performance. So, understanding what to prioritize is key if you’re looking for the best SD cards for trail cameras or SD cards for game cameras. Let’s explore everything that matters most.

Trail Camera micro sd cards

Difference Between Game Camera and Trail Camera

The terms “game camera” and “trail camera” get mixed up a lot, though they are designed for specific uses. They’re both meant for outdoor settings, typically by hunters or those studying wildlife, but their goals can differ.

Game Camera

A game camera helps hunters monitor wildlife. It helps track animal behavior and movements by providing high-quality footage. These cameras are set up in areas where hunters want to learn about animal movements. Many have useful features like long battery life, better low-light performance, and wireless transfer capabilities.

Trail Camera

Trail cameras are placed along nature trails or in natural spots to record wildlife through images or videos. They help with wildlife observation, studying behavior, or research. Their broader features than game cameras include wider lenses and improved durability for harsh weather. Some are also used for outdoor security or adventure tracking.

How to Select the Best SD Card for Game Cameras and Trail Cameras?

You need to consider different aspects that are crucial to you when you are looking for the best SD Card for a trail camera or game camera. Cellular connectivity, sensitivity range, trigger speed, and quality are the most important factors to consider when selecting a new SD card for trail camera.

Speed

Quantified by Class or UHS (Ultra High Speed) ratings, the SD card’s speed is crucial if your camera produces high-quality images and video. The majority of game cameras and trail cameras are compatible with Class 10, a standard for contemporary SD cards with a minimum write speed of 10 MB/s. Compared to Class 10, UHS-1 offers faster speeds of up to 104 MB/s. UHS-3 cards work best with cameras that capture 4K or high-definition footage.

Capacity

The capacity of the SD card determines how many images or videos it can store. Capacity is crucial because game and trail cameras can record hundreds or even thousands of pictures. It also depends on how frequently they are activated.

  • For cameras that are used for shorter periods and only take a few pictures or videos daily, 16GB to 32GB are perfect.
  • 64GB–128GB: Larger capacity cards are advised for cameras set up for long-term monitoring. They are also for recording many pictures and videos.
  • 256GB or more: A high-capacity SDHC card for trail camera may be necessary if you’re shooting 4 K videos or taking large batches of pictures to ensure enough room.

Flash Format

The flash format affects speed and longevity, indicating how they are comparable.

  • SLC provides the fastest speeds and extended lifespan, but the cost is higher.
  • MLC is praised by most users for its cost-to-performance ratio, especially for game and trail cameras.
  • TLC is slower but more reasonably priced. There might be better options for cameras that take many HD pictures or videos.

Cost

In terms of cost, there is no universal solution. More expensive SD cards with larger capacities and higher speeds will cost more. Game and trail cameras don’t always need top-of-the-line SD cards. A more affordable Class 10 card is enough for stills and lower-resolution videos. Purchasing a UHS-1 or UHS-3 card is worthwhile. It is best if your game or trail camera needs to record high-definition video or take frequent snapshots. SDHC card for trail cameras is a top pick due to its shock resistance and waterproofness to withstand outdoor use.

Top SD Cards For Trail And Gaming Cameras

After discussing the technical aspects, let’s examine some top SD cards for trail and gaming cameras. So you can easily pick best SD card for game camera or trail camera.

  • Ultra-Pro SanDisk (UHS-1): Ideal for taking pictures and recording HD videos. The capacity range is 32–256GB. SanDisk is renowned for its exceptional dependability.  It is also famous for the Extreme Pro, which provides game cameras with excellent speed and capacity.
  • Professional Lexar 1000x (UHS-3): Best for 4K video and fast speed. It has a 32GB–128GB capacity. Trail cameras that take long bursts of sharp images or 4K videos are ideal for this card.
  • Samsung EVO Select (UHS-1): A cost-effective option for standard HD photos and video. 64GB to 128GB of capacity. It offers a reasonable price point along with good speed and dependability.
  • Canvas React Kingston (UHS-3):  Best uses are 4K video recording and extended outdoor use. Capacity range: 64–256 GB. This is the best option for demanding cameras that need durability in harsh weather conditions and high-speed transfers.

Where Can I Buy The Best Micro SD Cards For Game And Trail Cameras?

You can pick best SD card for game cameras and trail cameras online or at your local electronics store.

Reputable websites like BandH Photo Video, Best Buy, and Amazon offer a wide range of SD cards at different price points.You should always look at reviews and ratings to ensure you get a good product that fits your needs.

Conclusion

Selecting the best SD card for game and trail cameras is easy. With the information discussed above, you can easily make your decision. For extra safety, think about purchasing an SD card. When the unexpected happens, a backup makes all the difference. Don’t forget to let us know what’s your pick.

what does nm mean in flash chips?

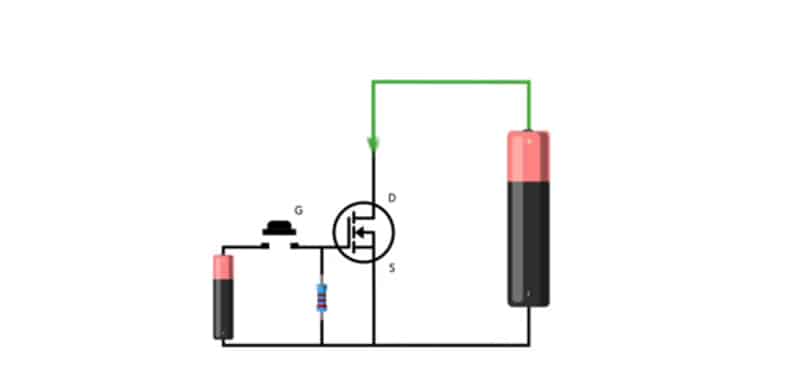
In today’s mainstream CPUs or NAND Flash, there are often hundreds of billions of transistors packaged inside. What exactly are these transistors? And what is their construction like? Broadly speaking, transistors are mainly divided into two types: BJT bipolar junction transistors and FET field-effect transistors. Currently, most of the transistors packaged in chips are MOSFETs, which are a type of field-effect transistor. This is its circuit symbol.When we apply a high voltage to its gate, the drain and source can conduct, but when we apply a low voltage, it will cut off, which is equivalent to being disconnected.

how is mosfet work in chips
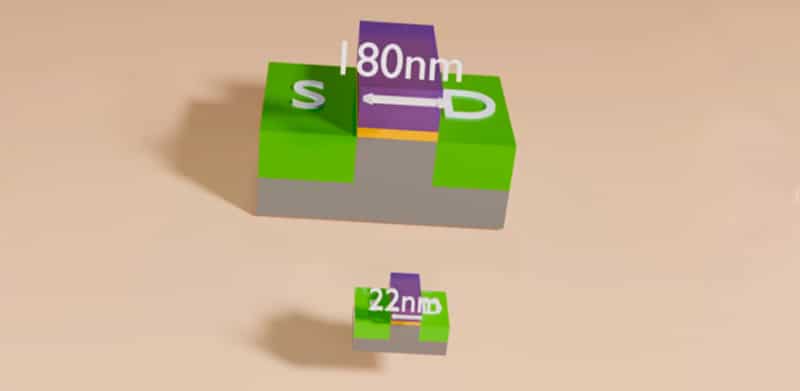
Next, let’s look at its construction. This is an early planar transistor, mainly used for chip processes ranging from 10,000 nanometers to 22 nanometers. Now, let’s talk about how it works. These are its drain and source, which are essentially two pieces of n-type semiconductors with a high concentration of free electrons. In the middle is the substrate, which is essentially a p-type semiconductor with a low concentration of free electrons. If we connect the drain and source with electricity at this time, it cannot conduct.Because although the p-type substrate has a certain amount of electrons, the concentration is extremely low and far from enough to build an effective electrical conduction path between the source and drain. At this time, people added an insulating layer on the substrate, and then added a highly conductive metal plate on the substrate as the gate. In this way, when we apply voltage to the gate, the electrons in the p-type substrate will be attracted to the vicinity of the insulator, and the concentration of free electrons at the junction of the substrate and the insulator will become higher. At this time, when we connect the source and drain with electricity again, it will conduct. Because an effective electrical conduction path has been built between the source and drain.

For this planar transistor, the chip process refers to the length of its gate. For example, if its gate length is 180 nanometers, then it is a chip with a 180-nanometer process. However, when the chip process is reduced to 22 nanometers and below, due to the short-channel effect, the distance between the drain and the source is too short, and the drain electric field will interfere with the gate’s control over the channel, leading to an increase in leakage current. This invisibly increases power consumption, and the channel is difficult to shorten further.

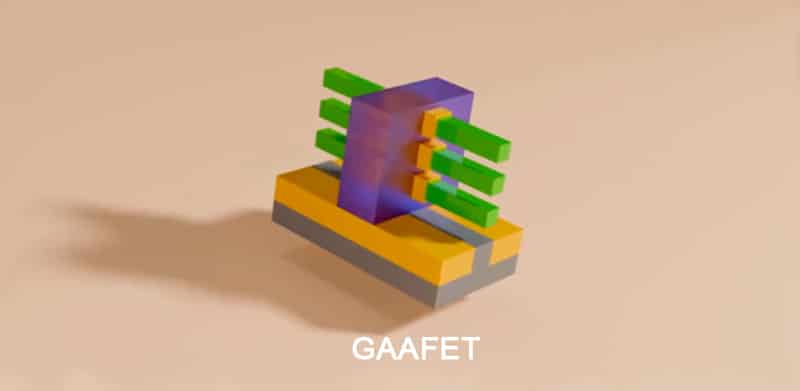
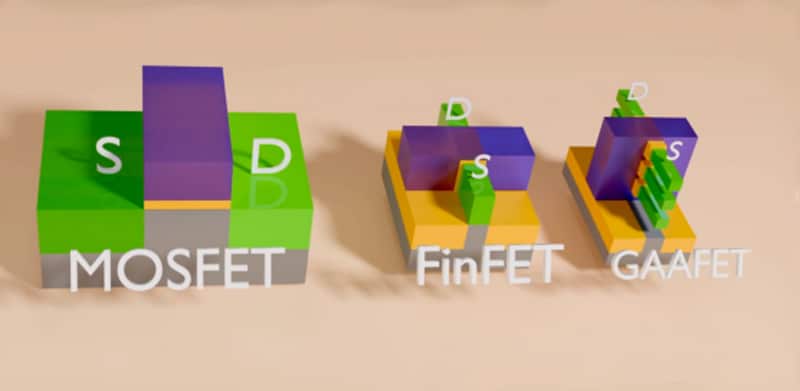
Therefore, when entering the era of three-dimensional transistors, such as FinFET and GAAAFET transistors, the “nanometers” in chip manufacturing no longer refer to the gate length of the transistor. The term “nanometers” is more of a marketing term. For example, in a 3-nanometer process chip, the gate length of its transistors may be between 15 and 20 nanometers. You can see the difference in construction between them and conventional MOSFETs. The conventional construction direction is horizontal, while the construction direction of three-dimensional transistors is vertical. Next, let’s look at the construction of FinFET and GAAAFET transistors. First, let’s talk about FinFET. The FinFET transistor was invented by Professor Hu Shengming from Taiwan Province and is mainly used in the 22-3 nanometer process nodes. Because its channel is protruding and looks like a fish fin, it is called a fin transistor. This type of transistor has solved the short-channel effect well, but it is still essentially a MOSFET. The working principle of the fin transistor is similar to that of the planar transistor. The bottom is a large substrate, which is a p-type semiconductor. Its two sides are covered with two insulators, and above are two N-type semiconductors as the source and drain. Then, the three sides are surrounded by insulators, and the top is a highly conductive metal as the gate. When we electrify the gate, all three sides of the p-type substrate will be attracted by the electric field, providing better gate control.

Despite the improved gate control provided by three-dimensional structures, for extremely small sizes, such as below three nanometers, electric field interference and leakage current are still hard to avoid. Therefore, the ingenious humans invented the GAAAFET transistor, also known as the gate-all-around transistor, which is mainly used below three nanometers. You can take a look at its structure: the bottom layer is the substrate, followed by two layers of oxide, which can be seen as the tray of the transistor. Above that are three very thin nano channels, composed of n-type and p-type semiconductors. Then, a layer of oxide (insulating material) is wrapped around the four sides of its p-area, and a piece of highly conductive metal is added as the gate. Compared to the three-sided gate of FinFET, GAAAFET achieves a 360-degree gate wrap, hence the name gate-all-around transistor. This further strengthens the gate control capability, and these three channels essentially belong to one transistor. Devices like Central Processing Units (CPUs) and Graphics Processing Units (GPUs) often need to handle large amounts of data and complex computational tasks, which requires the transistors that make them up to have a strong current driving capability for rapid signal transmission and processing.

GAAFET transistors, due to their multi-channel design, can significantly enhance the driving capability of the transistor. Without significantly reducing the gate length, FinFET and GAAAFET transistors increase gate control by wrapping around the gate from multiple angles, reducing the unit area occupied by the transistor. This allows for more transistors to be integrated within the same area, effectively shortening the gate length. This is my interpretation of these three types of transistors, and I hope it helps you understand them better.

memory card and usb drive SSD

What is NAND Flash Memory and How it works

What is Flash memory

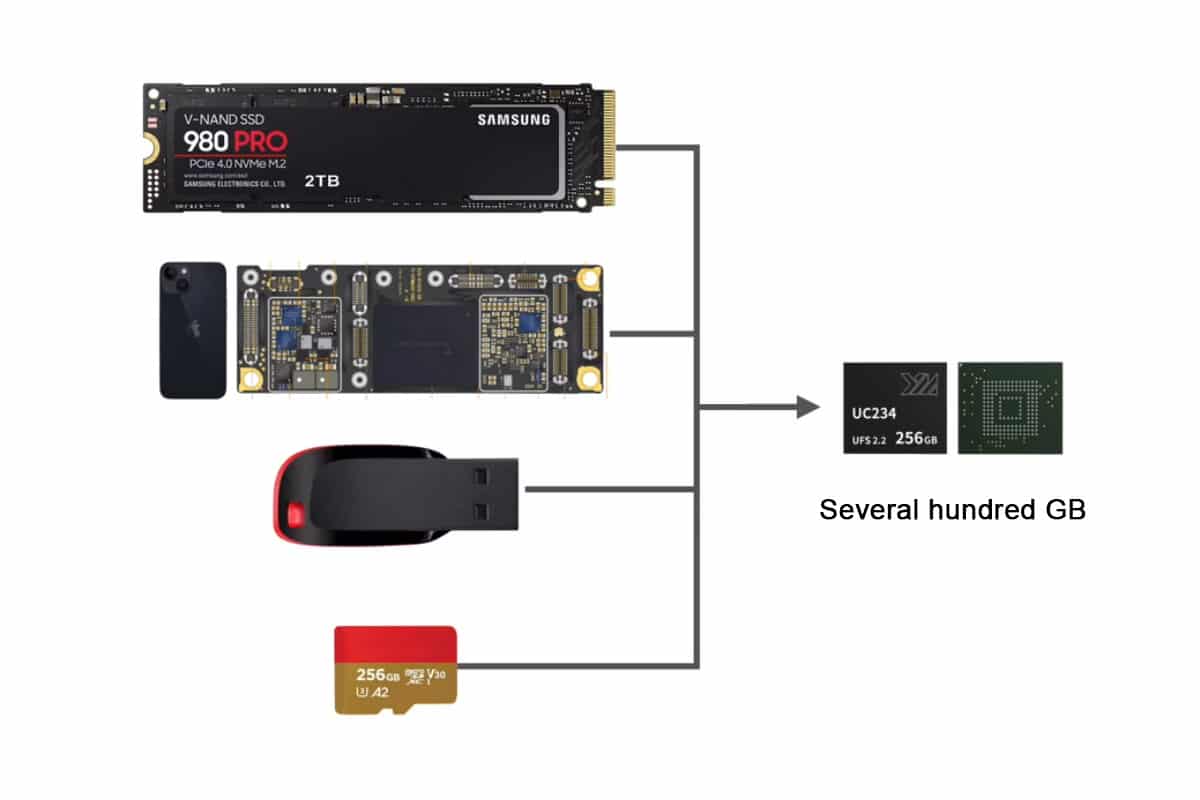
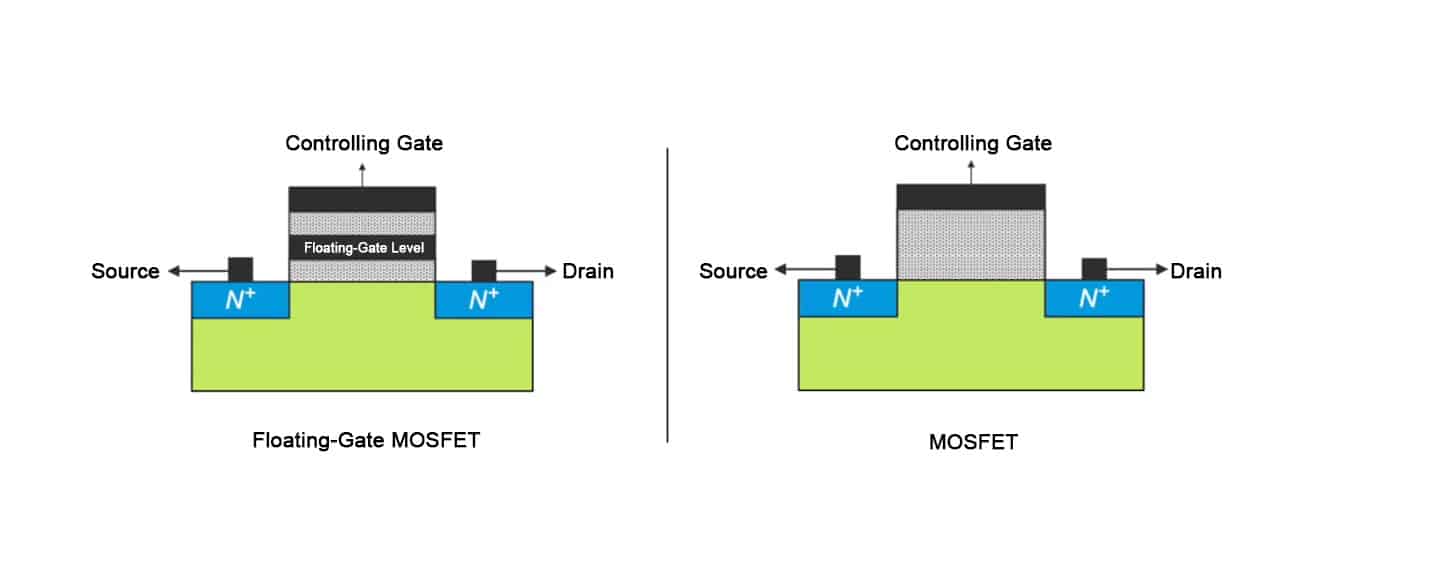
Flash memory is the core of storage for solid-state drives, USB drives, and memory cards. It can typically store hundreds of gigabytes of data in a space the size of a fingernail. It is an invention that is as renowned as the Nobel Prize. Flash memory storage relies on floating-gate MOSFETs. Before discussing floating-gate transistors, let’s briefly introduce MOSFETs, as floating-gate transistors are an improvement based on MOSFETs. The principle of MOSFETs is quite understandable. These three black areas are metal conductors, and the n-type semiconductors on both sides contain many free electrons. If we apply electricity to the n-type semiconductors, they can conduct, acting like a piece of wire. The p-type semiconductor in the middle has very few free electrons, so when we apply voltage to the base, it is cut off because the concentration of free electrons in the p-region is too low to form a conductive channel.
memory card and usb drive SSD
To make the MOSFET conduct, we can apply a voltage to its gate, attracting the electrons in the p-region towards the gate.
Because there is a layer of silicon dioxide between the gate and the p-region, which is insulating, free electrons cannot pass through under normal circumstances. So, when we apply voltage to the gate, the free electrons in the p-region gather near the insulating layer, forming a conductive channel, and thus it conducts.

Floating-gate mosfets

However, when we remove the gate voltage, the electrons gathered near the insulating layer disperse, and no conductive channel is formed. Since no current flows, the MOSFET is cut off at this time. This is the circuit symbol for a MOSFET. Simply put, when we apply a high voltage to its gate, it will conduct, and when we apply a low voltage, it will be cut off.

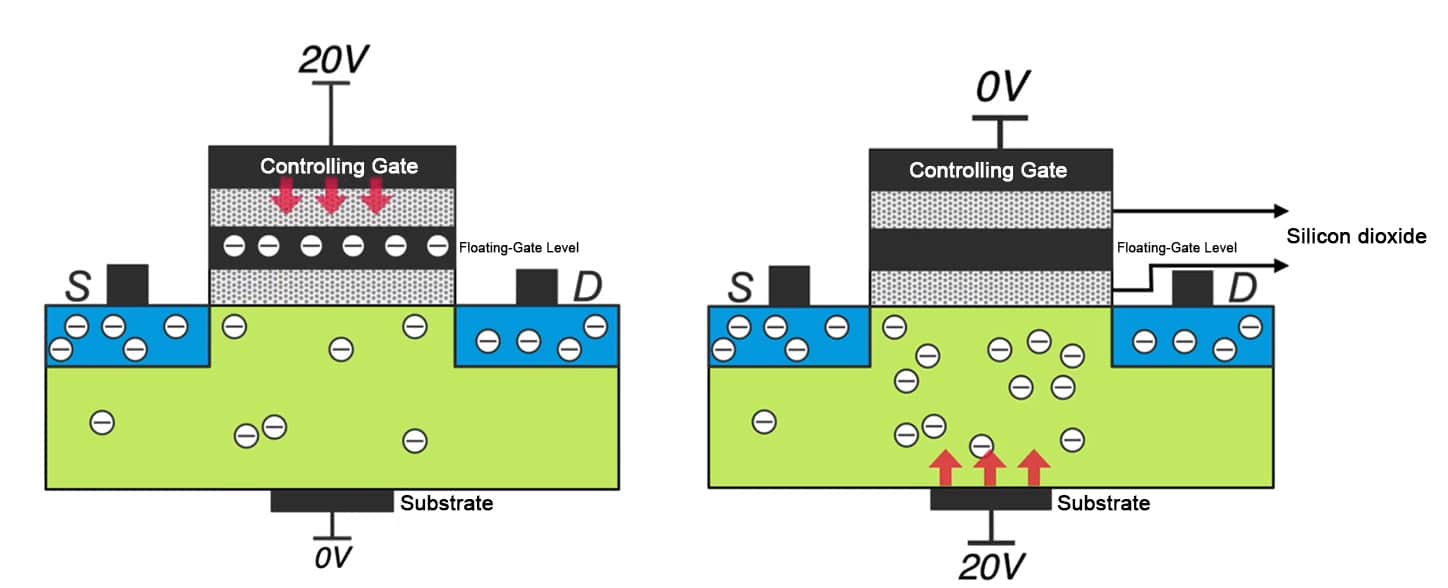
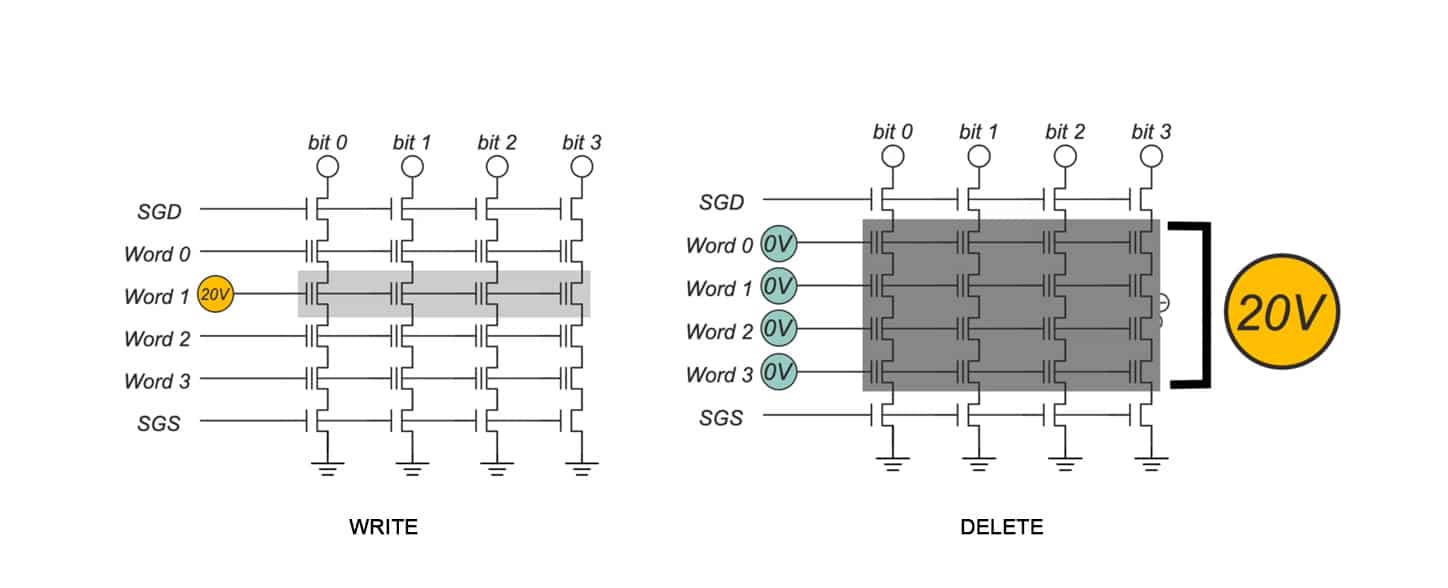
Floating-gate MOSFETs are very similar to MOSFETs, except for an additional bar in the middle, which represents the floating gate. Since they are both MOSFETs, their structures are similar. A floating-gate MOSFET has an additional conductive floating gate layer added to the oxide layer of a MOSFET, allowing it to store information. Let’s talk about how to write information first. If we apply a high voltage of 20 volts to the gate and 0 volts to the substrate, some of the free electrons in the channel will be attracted to the floating gate layer. Even if we then power off, the free electrons will still be stored in the floating gate layer because the floating gate layer is insulated by silicon dioxide layers above and below, and the free electrons simply cannot escape. This is how information is stored, with the charge stored being considered a logical zero.There is also a question about how electrons can pass through the tunnel oxide layer, which is also an insulating layer. This is actually due to the tunneling effect. For example, a silicon dioxide oxide layer is normally insulating, but if we apply a voltage large enough, greater than 10 million volts per centimeter, electrons can pass through this insulating layer. This is the tunneling effect. When we apply a 20V high voltage to the gate, due to the thinness of the tunnel layer and the high voltage per unit thickness it withstands, electrons from the p-region are attracted. It is important to note that at this time, do not apply voltage to the drain, or a sub-threshold conduction channel will form, and electrons will flow in this manner, which would hinder the occurrence of the tunneling effect.

When we apply a low voltage of 10 volts, electrons cannot pass through the insulating layer, just like a conventional MOSFET. Understanding the principle of flash memory writing makes it easy to understand its parameter principle. We just need to apply a high voltage of 20 volts to its substrate while applying 0V to the gate. At this time, the free electrons imprisoned in the floating gate layer will be attracted out, and the data will be erased. Erasing is writing a logical one. Storing one bit of information requires only one floating-gate MOSFET. To store 1GB of information, at least 8.5 billion floating-gate transistors are needed. How do we control so much information?

How does nand flash work​

You can see this is a flash memory block that can store 16 bits of information. The middle ones are floating-gate MOSFETs that store information. The top and bottom ones are conventional MOSFETs that play a controlling role here. The horizontal ones are its word lines, connecting the gates of these rows of MOSFETs. The vertical ones are its bit lines. Its writing minimum unit is a page. A page is a row. When we want to write, we first need to erase all the data in this entire block, which means releasing the electrons stored in the floating gate layer, and all storage units will become logical ones.

How do we write by page? For example, if we want to write the page “word1,” we need to apply 20 volts of high voltage to the radiation MOSFETs of this page, and other MOSFETs should not be given high voltage. In this way, only the data of this page with 20 volts of high voltage can possibly be written. If we want to store a charge and write 0, we write 0 to its corresponding bit line, so free electrons will be attracted to the floating gate layer, and this bit will be written as logical 0. If we want to write 1, it’s very simple because we need to erase before writing, and after erasing, the data is all 1. We just need to keep the data unchanged. For example, if we want to write 1 to this bit, we write a high voltage to its bit line, which will hinder the tunneling effect. So, free electrons will not be captured by the floating gate layer, and it will remain logical one unchanged. The minimum unit for writing data is a page of data, and the minimum unit for erasing data is to erase the entire block. We need to give all of them zero volts and then apply a high voltage of 20 volts to the substrate.

You might be curious why the minimum unit for erasing is an entire block of data. Look at its cross-section, and you will understand. All storage units of this flash memory share a substrate. Just by applying a high voltage of 20 volts to the substrate, the operation of erasing the entire block of data can be completed. The minimum writing unit is a page because the gates of the MOSFETs on this page are connected together. This block of data can store 16 bits of data. One page is 4 bits of data, and a real flash memory page has 65,536 storage units per block. There are 512 pages in the data, so a block of flash memory data can store more than 33 million data points. This is what we call 4MB of data. Even if we want to write one bit of data, we also have to erase these more than 33 million bits of data before we can write.A block of data is 4MB, and to make up 1GB, you would need 256 flash memory blocks. The packaging size of the chip is standardized. To package enough storage units within the chip, the storage units must be made small enough to fit more of them in. However, as they are downsized, many issues arise. For instance, the tunnel oxide layer also becomes thinner. Due to the process of erasing and writing, electrons need to pass through the oxide layer repeatedly. If this happens too many times, the tunnel oxide layer can become damaged and fail to block the electrons, leading to data not being well preserved.

What is 3d nand flash​


To address this issue, humans invented 3D NAND flash, which eliminates the need to increase the number of storage units by downsizing MOSFETs. This is a 4-layer flash that stands the conductive channels upright, with horizontal pages of data. This area represents a block of data, and the middle contains all its storage units. So far, 3D NAND flash memory has achieved a stack of 232 layers, with a storage density of about 15GB per square millimeter. By using 3D stacking, not only can the unit capacity be increased several times, but also, because of the three-dimensional technology, the size of the storage units does not need to be reduced. As a result, the number of write-erase cycles is increased by more than tenfold. This is my understanding of flash memory technology, and I hope it helps your comprehension.

STM32 Demo Board: Getting Started and Advanced Preparation

Essentials for Beginners

The development board may look simple, but many people are discouraged at the step of how to use it. Today, I’m here to teach you how to solve the problems of getting started with single-board computers (SBCs), taking the Orange Pi Zero 3 as an example. How many steps are generally needed to use an Orange Pi? First, prepare a USB Type-C power cable, a charger with at least 5V 2A , a memory card with a capacity of at least 8GB, and a Micro HDMI cable to connect to a monitor or TV to display information from the development board. Some Demo Boards may have DP or mini HDMI interfaces, or standard HDMI interfaces, and you will need to purchase the corresponding cables to match your development board.

custom Micro SDHC card 16GB
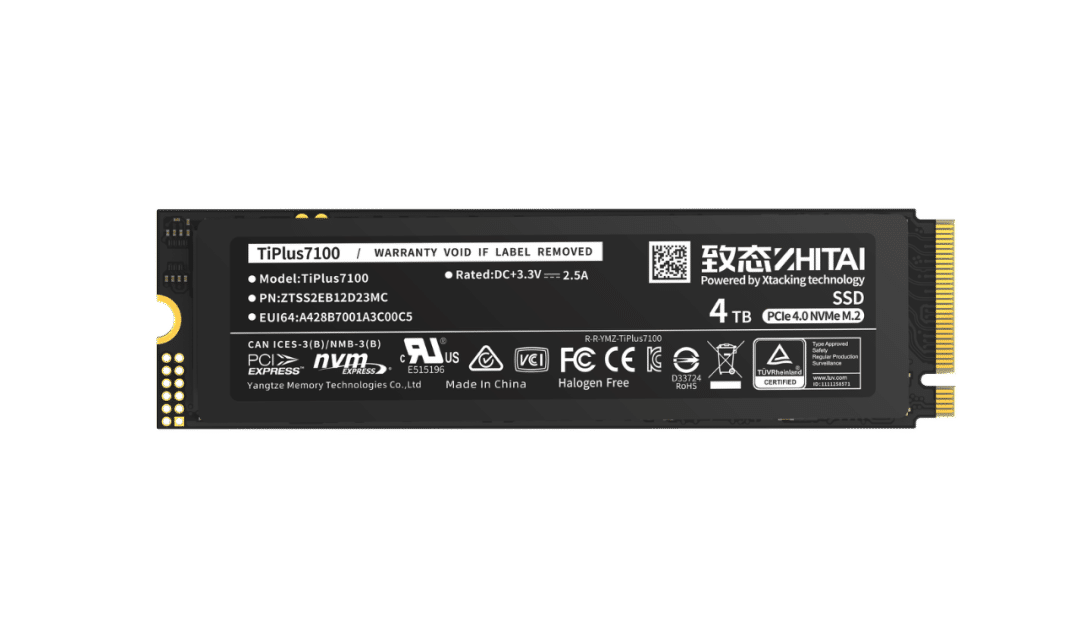
If your monitor doesn’t have a DP interface, you can opt for a DP-to-HDMI cable. However, as of now, there are still few Demo Boards without an HDMI interface. We also need to prepare a keyboard, and if you’re using a desktop like Windows, you’ll also need a mouse. If your Demo Board doesn’t have WiFi or Bluetooth, you’ll need to provide an Ethernet cable and access to the internet. Finally, you’ll need a working computer with a USB port. If your Demo Board has onboard eMMC, you won’t need to prepare a TF card. If your development board also has an M.2 SSD interface and you happen to want to use an SSD, you’ll also need to prepare an SSD.

After preparing all this hardware, the next step is to install the system. Installing a system on a development board is simpler than on a computer. First, find the official website of the development board and download the system you want to use onto your computer. Then you can proceed to install the system. There are several installation methods, which differ depending on which storage medium you want to install the system on, such as a memory card, eMMC, or SSD. Installing on a memory card is the simplest.

Here, pay attention to the protocols and sizes of the SSDs supported by the development board. There are two protocols: M.2 SATA SSD interfaces and NVMe SSD interfaces. In terms of size, they vary based on length with M.2 2230, 2242, and 2280 being the main sizes. You need to choose the SSD based on the protocols and slots provided by the development board.

Pay attention to the protocols and sizes of the SSDs supported by the development board. There are two protocols: M.2 SATA SSD interfaces and NVMe SSD interfaces. In terms of size, they vary based on length with M.2 2230, 2242, and 2280 being the main sizes. You need to choose the SSD based on the protocols and slots provided by the development board.

Flashing the system to the SSD is also done using the Ralink development tools, with the difference being the configuration file; just select PCI and the system installation is complete.

Once the hardware and software are ready, plug in the HDMI and power cables and wait for the system to boot. Note that some Demo Boards have a switch, which could be a selection switch or a push-button switch, so you should refer to the documentation for operation. Generally, the system will start automatically when powered, and if it doesn’t start automatically, check if the switch hasn’t been pressed.

Professional Player Essentials

Some commonly used tools in electronic design, which can also be considered essential, start with soldering. First is the soldering iron, which comes in temperature-controlled and adjustable temperature models. A temperature-controlled soldering iron is similar to this type where you plug it in and it directly reaches a fixed temperature.

The higher the wattage, the faster it heats up. An adjustable temperature soldering iron is similar to this type, generally adjustable between 200 to 500 degrees, because some chips have requirements for soldering temperature and cannot withstand high temperatures, so this adjustable temperature soldering iron has a broader range of applications. When using a soldering iron, you need a soldering iron stand, which comes in various types and can be chosen based on personal preference.

Soldering Iron

When using a soldering iron, you need to frequently clean the tip, which is where the soldering sponge comes in, similar to the one in the picture. Then there’s solder, which comes in leaded and lead-free varieties, with different tin content and wire gauges. I personally often use 63/37 tin with a 0.6mm diameter.

There’s also flux in the form of solder paste or rosin, solder paste is similar to the one in the picture. Rosin is similar to this type of desoldering pump. When soldering and needing to remove some solder, a desoldering pump is needed, which looks like the one in the picture. Then there’s the solder wick, which is this type of perforated board, but it’s basically disposable, and after soldering, it’s hard to clean and reuse.

Breadboard

A breadboard is a type of board where you can insert components and perform some debugging and testing.

Dupont Wire

Dupont wires are used to connect two endpoints of a test circuit, generally divided into male and female ends, with the female end being this type with holes and pins. Choose according to your needs, and the male end looks like this, which is also a commonly used small tool in testing circuits. You can insert Dupont wires or their corresponding sockets, and this is the socket corresponding to the pins.

Tinned Wire

Then there’s tinned wire, also known as enameled wire, which comes in different thicknesses and lengths, and is also commonly used in testing to connect two solder points.

Others

Tweezers are used as conductors for adding small precision components, and small surface-mount resistors and capacitors are commonly used. Flush cutters are used for trimming, similar to this type, generally for cutting the leads of some soft components. To strip the outer skin of wires, you need wire strippers, which are also commonly used.

A multimeter is also the most commonly used tool for measuring current, voltage, resistance, capacitance, and continuity, which can be said to be the most commonly used tool in electronic design.

Conclusion

Then there are some tools that are not commonly used at the beginning of electronic design, but can be added later when needed, such as hot air guns, needle-nose pliers, screwdrivers, some fixtures, heat shrink tubes, regulated power supplies, oscilloscopes, and logic analyzers. Basic electronic design may not need these for the time being.

This article introduces how to choose and use STM32. It is hoped that through the introduction in this article, beginners can understand the basic concepts and entry guide of STM32 for subsequent learning and application. If you don’t understand embedded systems, come to me. Thank you, everyone.

MLC 10000 write cycles, TLC 3000 to 5000 write cycles.

MLC Vs TLC, Is MLC Better Than TLC for SD Card?

MLC Vs TLC NAND Flash Memory Card

MLC Vs TLC,An SD card’s cost and storage are only part of the story. For essential data, understanding the NAND flash type—MLC or TLC—matters. These types affect speed and durability. This article explores them, helping you make the best choice.

MLC Vs TLC, Overview of MLC and TLC

In SD storage, the choice between MLC Vs TLC NAND flash impacts your card’s performance, lifespan, and cost. These flash types represent different data storage approaches, offering options tailored to specific user needs.

MLC 10000 write cycles, TLC 3000 to 5000 write cycles.

What is a Multi-Level Cell?

MLC, storing two bits per cell, offers a balance of speed and durability. This type works well for users needing moderate performance without a premium price.

Why MLC is Beneficial for SD Cards?

  • Enhanced Durability: With fewer bits per cell, MLC wears down more slowly, making it ideal for those needing consistent performance.
  • Affordable Quality: Though pricier than TLC, MLC is more affordable than high-end options, striking a nice balance for value-focused users.
  • Fast Performance: MLC’s read and write speeds often outperform TLC, supporting faster data handling for larger files.

MLC’s Downsides

  • Higher Cost: MLC isn’t as budget-friendly as TLC, which may not suit everyone.
  • Moderate Storage Density: MLC’s lower bit density per cell limits storage capacity compared to TLC.

Understanding TLC NAND Flash

TLC stores three bits per cell, making it an economical choice with high storage potential. It’s renowned for consumers looking for substantial storage without needing professional-grade speed.

Advantages of TLC in SD Cards

  • Budget-Friendly: TLC’s lower production cost leads to cheaper SD cards, ideal for everyday users.
  • Larger Capacity: Higher bit density per cell means more storage, perfect for extensive multimedia files.
  • Acceptable Speed for General Tasks: While slower than MLC, TLC’s performance is sufficient for daily use.

TLC’s Drawbacks

  • Shorter Lifespan: Increased density causes more wear, affecting durability in heavy-use settings.
  • Lower Speed: TLC’s read/write speeds can be slower, noticeable for data-heavy tasks.
  • Potential Data Loss: Storing three bits per cell can lead to gradual data degradation, though error correction assists in maintaining data integrity.

MLC vs TLC NAND Flash Memory: Key Differences Between

MLC Vs TLC cards differ mainly in cost, lifespan, and speed. Let’s break it down for clarity.

Cost: Affordability and Value

TLC cards are usually more affordable than MLC cards. This is because TLC can store three bits of data per cell, which allows for higher storage density and lower production costs. As a result, you’ll often find TLC cards offer more storage for a lower price.
In contrast, MLC cards store only two bits per cell, which requires more cells for the same amount of data. This raises the cost, making MLC cards more expensive. But this higher price brings better performance and durability. If you need a cost-effective option for light use, TLC is good, but MLC is a better choice for long-term performance.

Life Cycle: Durability

In terms of durability, MLC generally outlasts TLC. MLC cards wear less over time since they store fewer bits per cell. TLC cards, on the other hand, put more strain on their cells due to storing three bits per cell, which can lead to quicker wear. If you’re using the card for tasks like photography or video recording, where you write data frequently, MLC is more durable. TLC works just fine for lighter use, but MLC is the better option for long-term, heavy use.

Speed and Performance: Efficiency and Reliability

When it comes to speed, MLC cards are faster than TLC cards. Since MLC stores fewer bits per cell, it can quickly read and write data. This is especially useful for high-demand tasks like transferring large files or recording video. MLC cards maintain consistent speed even when the workload increases. While fine for everyday tasks, TLC cards might slow down during intensive use, especially for 4K video recording. If you’re working with demanding applications, MLC is the better choice for speed.

Relationship Between NAND Flash Types and Memory Cards

In SD and MicroSD cards, NAND flash types—categorized as SLC, MLC, and TLC—shape factors like speed, durability, and storage. Each type has specific advantages designed for different demands.

Impact on Speed and Performance

  • SLC (Single-Level Cell): Fastest and most durable, ideal for high-performance applications like servers or professional cameras, but expensive.
  • MLC (Multi-Level Cell): Balanced speed and cost, good for consumer electronics like DSLRs and high-end smartphones. It’s slower than SLC but offers a good compromise for most users.
  • TLC (Triple-Level Cell): Slowest, best for everyday use like storing photos or music. It’s affordable and provides large storage, but performance can degrade under heavy use.

For example, if recording a 4K video, MLC or SLC would be ideal, while TLC works for lighter tasks.

SLC VS MLC VS TLC Impact on Capacity

  • SLC: Limited capacity but offers the best performance and durability.
  • MLC: Offers a balance between storage and performance, typically found in mid-range devices.
  • TLC: High storage density, making it the most affordable option, but with slower performance, especially in large capacities.

TLC cards provide more space at a lower price but may perform slower than MLC, which strikes a balance.

Future Developments in NAND Flash Technology and Implications for SD Cards

The NAND flash field is evolving rapidly, with QLC improving storage and performance. As MLC and TLC are replaced by QLC, SD cards show clear advantages in cost, capacity, and efficiency.

QLC: More Storage at a Lower Cost

QLC technology, storing four data bits per cell, provides higher capacity for SD cards. This is a win for consumers, especially those handling large files like videos or photos, as it means lower prices per storage unit. However, QLC’s design does lead to faster wear, making it less ideal for frequent heavy use.

Looking Ahead: PLC in Development

With QLC mainstream, research is now focused on PLC (Penta-Level Cell), which could hold even more data. While still experimental, PLC may soon offer larger capacities and lower costs.

Lower Costs for Consumers

Each advancement in NAND technology leads to more affordable SD cards, which is good news for anyone with high data needs.

Enhanced Controllers to Boost Performance

Newer controllers and firmware updates are designed to improve the performance of high-density NAND types like QLC, helping them run faster and last longer.

Different Options for Different Needs

Consumers will see more tailored choices in SD cards. SLC remains best for durability, while QLC and PLC will serve those looking for more affordable storage.

MLC Vs TLC Conclusion

Factor

MLC (Multi-Level Cell)

TLC (Triple-Level Cell)

Cost

Moderate

Lower

Life Cycle

Higher durability

Lower durability

Speed

Faster read/write

Moderate speed

Capacity

Moderate

Higher

Ideal For

High-use, performance-focused tasks

General use, high capacity needs

Choosing between MLC and TLC NAND flash depends on balancing factors like speed, durability, and budget. MLC is perfect for heavy tasks with its performance and durability.
TLC is budget-friendly and offers more space, making it ideal for general use. As technology advances, SD cards are likely to get improved, providing users with more specific choices.

0
Back to Top
Product has been added to your cart